New World Expedition Guide: "Starstone Barrows"

We are here with Starstone Barrows missions, preparation process, boss fights and tips, the second Expedition of New World.
New World has 6 challenging expeditions for players to overcome, and it's Starstone Barrows' turn in the expedition guide . If you want to be a part of the Starstone Barrows adventure, you must first reach Level 35. You must complete William Heron's questline and get the “tuning orb” item like last time. You remember the dog in your Amrine Excavation adventure. We hope you have collected the bones for Barkimedes because you must have done his duty to begin this expedition. No need to worry. You can return and complete this quest again. “ Starstone Tuning Orb“There is an easy way to get it this time. Get the Reaper's Locus, a Level 33 quest in the Brightwood area, from Herbalist Lau and he will have given you the item when you start the quest. If you want, let's talk about all the details of this expedition in the guide. Lets start!
New World Starstone Barrows Preparations and Tips
Team Composition
- As we suggested last time, this time we recommend having a solid tank on your team when entering the Starstone Barrows expedition. Tanks must prevent fragile teammates from taking damage, and must also protect themselves by retreating when necessary.
- This time we recommend having a ranged or magic DPS (Damage Focused) player on your team. Ranged players can inflict high damage and defend themselves without messing with the crowd.
- Finally, the essential element of every team is the improvement player. The most important and shining gem of the group. You will need a lot of improvement in this adventure. If a player uses at least Life Staff, it's done.
Items You Should Have With You
- One "Starstone Tuning Orb". You will use it as you enter and it will disappear. Just having one player is enough to get the whole group into expedition. Also, if you take the Reaper's Locus quest (Level 33) from Herbalist Lau, it will already give you this item needed to get you inside.
- Finally, the Azoth Staff we are used to. At least one player must bring this item with them. If you don't know how to get it, you can find out by clicking the link below.
───────────────────────────────────
► How to Obtain Azoth Staff (Scepter)?
───────────────────────────────────
Enemy Types
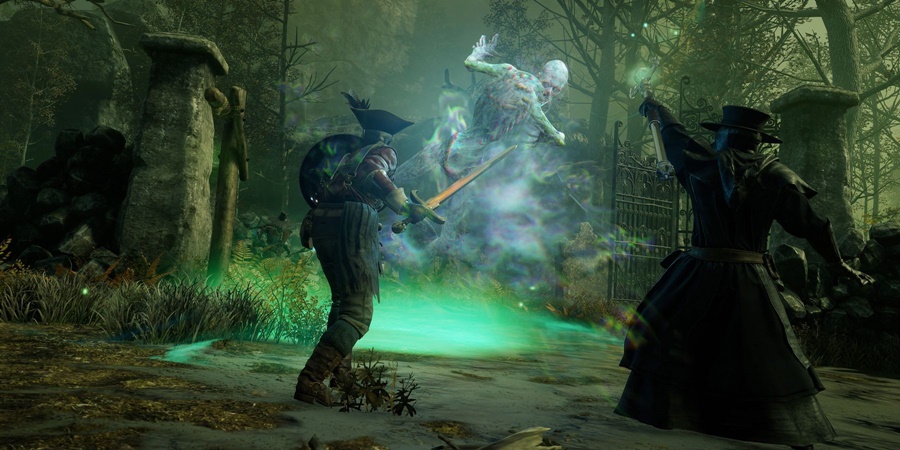
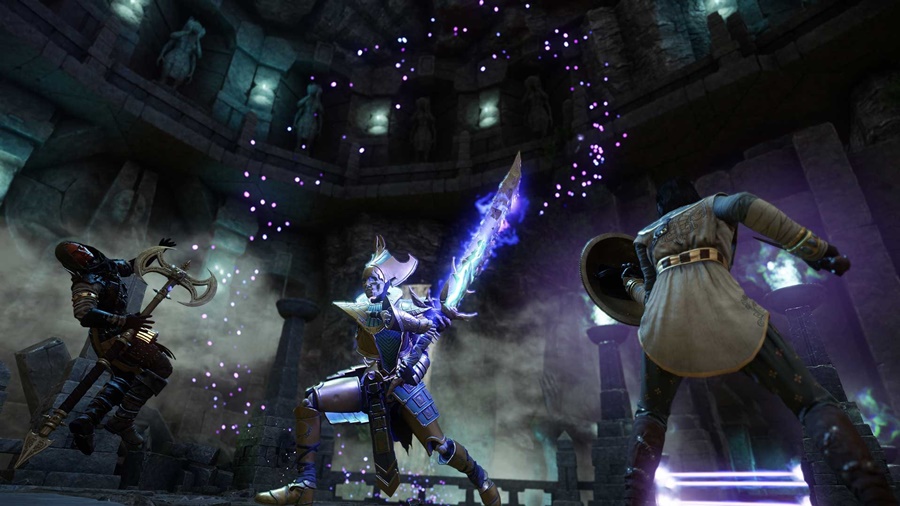
When you enter the Starstone Barrows expedition, you will encounter the following enemy types. These enemy types are “Ancient” enemies as they can pose a great threat.
- Starstone Warrior - This is the type of enemy you will encounter most in the entire expedition. They don't do much damage and aren't fast. It is useful to be careful only when they are in a flock.
- Starstone Guardian Javelineer – Ranged version of Warriors. They will keep their distance and damage you. Get out early.
- Starstone Guardian Shieldman – These enemies travel in packs. They consist of both warriors and spear-wielding enemies. It makes more sense to focus last and kill because they have high defenses and can take a long time to take down.
- Starstone Guardian Sentry – Similar to Warriors but wielding two-handed swords. These enemies love close contact. Their swords are good at range and can deal area damage. We recommend that you separate the ranks when fighting these enemies.
- Starstone Archer - As you can understand from the name, they are also enemies with a range advantage. They use bows and attack faster. Watch your distance.
- Starstone Shambler - They are harmless-appearing creatures in the form of corpses without legs. But don't let that fool you. Although they don't have legs, these enemies are the fastest type of enemy. They pounce on players and perform claw attacks. The best way to deal with it is to root out the problem by dealing area damage when they get together.
- Starstone Spearman - A melee version of spear wielding and ranged enemies. However, their attack range is long and they can deal area damage. However, because they are so slow, they are likely to die before they reach you.
- Starstone Soldier – Similar to Warrior enemies but using a mace or stick. They can't do any damage to the players other than swinging their weapons and they die easily.
- Starstone Guardian Reaver – These enemies are also similar to Warriors but wield dual swords. They make quick and uninterrupted attacks. You can divide and overcome these attacks with heavy attacks.
- Centimas – Elite is an enemy type. He uses two swords. The tank is there to melt. His life is a little high. We suggest you stand out from the crowd and finish the job.
- Ioane – Elite is a ranged spear wielder. It keeps its distance and inflicts heavy damage. If you focus, you can easily get rid of it.
- Starstone Guardian Mage – A powerful mage who uses arcane spells. The damage of these creatures can be a nightmare for players. You can easily get rid of it if you focus on the whole group.
- Limos - Another elite spearman. It is stronger than other types.
- Erebas - An Elite mage. He likes to group with Limos and others. Focus on this enemy first. As long as he stays in combat, he can spawn minions and become a nuisance.
- Sangarion – An elite reaver similar to Centimas.
Tasks
- Starstone of Shattering (Expedition): Collect Starstone Diadem for Greundgul the Regent. When the mission is finished, go to the Everfall compound and report to William Heron.
- Reaper's Locus (Expedition): Kill the Starstone Reaper and drop the Reaper's Locus item in it. Complete the quest by returning to Herbalist Lau in Brightwood. (You can get tuning orb by taking this quest.)
- More Bones for Barkimedes (Expedition): Simon Grey's dog, Barkimedes, now seeks a higher-level bone gnawing experience. Collect as many bones as you can inside and give them to Barkimedes. (You must have done the Bone for Barkimedes quest.)
-
► New World Expedition Guide: "Amrine Excavation"
-
Starstone Barrows Location
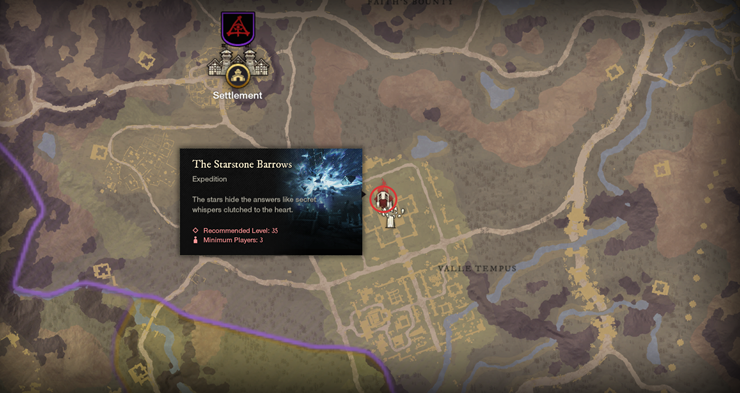
The Starstone Barrows expedition is located north of the Amrine Excavation. You can reach the map by examining it, or you can find it with the help of the image above. The place is also northwest of Value Tempus.
Starstone Barrows map
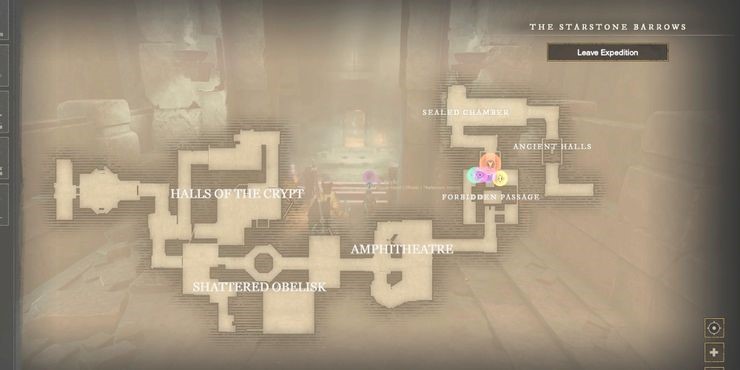
There are 6 different regions inside. These regions are as follows;
- Ancient Hall
- Sealed Chamber
- The Forbidden Passage
- The Amphitheater
- Shattered Obelisk
- Hall Of The Crypt
New World: Starstone Barrows Expedition Mission Complete Solution
Ancient Hall
- Quest: Explore the halls for a path to the Shattered Obelisk. (Examine the rooms and find a way to the Shattered Obelisk.)
You start the Starstone expedition from the Ancient Hall area. Head down the corridor and you'll find a note on your left called Nakashima's Frustratons. The aforementioned Nakashima Amrine is the mini boss in Excavation. When you're ready, turn right and fight the first group of enemies. Defeat the Warrior and Javelineers enemies first, then the Shieldman enemy. You can use this rank throughout the expedition and easily overcome the enemies.
At the end of the corridor, you will find a room with a downward staircase. Beware, many enemies are waiting for you below. As the enemies are in 2 groups, fight one by one and move on to the next corridor. Be careful when shooting enemies, you will die if you attract more enemy agros than necessary.
In the next part, there is a bridge leading to the big stone gate. Of course, this door is guarded by the enemy named Centimas. Next to him are ordinary enemies. Kill the spear thrower and Centimas first. Since Shieldman is a highly defensive creature, it will steal your time. Centimas can revive an enemy. This beast named Frost Aura can increase the difficulty of the battle. When you overcome the creatures, use your Azoth Staff and break the seal of the stone door.
Sealed Chamber
- Quest: Continue to explore the Ancient complex. (Continue to explore the ancient site.)
Behind the door you opened is a room with a way up. Here you will encounter many enemies. In the right room you will find Iron Vein and Lore Book. The place on the left is the actual place you need to go. There are lasers in this room. You must avoid the lasers by ducking and exit the Sealed Chamber area. Laser mechanics abound in the next expedition. You can think of it as a preview. After passing the lasers, you will have reached the first checkpoint. There will be an Expedition Chest to the right of the checkpoint. Get the items inside. Advance and destroy the enemies. Then pass the lasers moving up and down. Defeat the opponents you encounter and move right to the Forbidden Passage.
Forbidden Passage
- Quest: Navigate through the Forbidden Passage. Gain Arcane Protection to pass through the barriers. (Find your way through Forbidden Passage and earn Arcane Protection to pass barriers.)
This area contains lasers that directly cause you to die when touched. This region contains some puzzle and platforming elements. You have to solve puzzles and parkour. There are several ways to progress in this region, but we will tell you the easiest way. Go down the ramp to the right. Don't try to get through the lasers because there's no way to get through. Instead, hold onto the ledge on the pillar and walk along the ledge. Then you can drop yourself down. Do not follow the main trail after landing. You will fry. Instead, go to the right of the ledge you landed on and pass under the lasers. Climb the ledges and cross the other side. Move along the wall and avoid the moving lasers.
When you turn the corner, you will see a wooden path. Follow the road and jump to the opposite side. You have now reached the door you need to reach. Another checkpoint will be in your field of view, but you will not be able to reach it because of the lasers. Proceed to the left of the door and jump across the gap. Destroy the enemies and go up the ramp. Jump across. You arrive at the monolith area with a purple pool. A player must interact with the monolith and get the Arcane Protection feature. This shielding allows you to pass through the lasers and creates a gap in the lasers. In this way, other members of the group can safely pass the lasers. Go back to where the Checkpoint is and pass the lasers to activate the checkpoint. Kill the enemies in your way and take the River Cress node from the corner of the room. Continue on your way.
The Amphitheater
- Quest: Continue to explore for a path to the Shattered Obelisk. (Keep looking for a way to the Shattered Obelisk.)
You are now in a room with a large group of enemies in the middle and stairs at the back. After destroying the enemies, climb the stairs and defeat the enemies again. You will be in a corridor as you proceed. There will be a stone door and enemies in front of you. Kill the enemies and unlock the door with your Azoth Staff. New checkpoint opened.
Shattered Obelisk
- Quest: Defeat the Obelisk's guardians and then approach the Shattered Obelisk. (Defeat the Obelisk guards and approach the Shattered Obelisk.)
In this area, enemies are guarding a ladder. There are two ancients under the stairs. You can finish them one by one. When you climb the stairs, the road splits into two. Since there are lasers on the road on the right, you must take the road on the left. Keep on the road and destroy the enemies that come your way. Unseal the door and reach the fourth checkpoint. Proceed until you reach a large room. At the back you will see a large door. You can't open this door yet, so go to the stone door on the right.
Halls of the Crypt
- Quest: Search for a way to navigate through the arcane barriers. (Find a way through the Arcane barriers.)
Advance as you fight enemies on a linear path. You have to be careful as the number of enemies here is very large. Eventually you will find another monolith that gives you Arcane Protection. Enemies of Limos and Erebas will be waiting for you. Kill Erebas first. Once your battle is over, one of your teammates must receive the buff.
- Quest: Search for the key to gain entry to the Crypt of the Regent. (Search for the key needed to enter the Crypt of the Regent.)
Get through with your laser protection and fight enemies along the corridor. Pass the moving lasers and reach the fifth checkpoint. After a little progress, you will encounter the first boss of the expedition, Alectos the Relentless. Don't forget to clear the surrounding enemies before attacking.
───────────────────────────────────────
► New World Main Story Quest Guide
───────────────────────────────────────
New World: Alectos the Relentless Boss Battle & Tips
Alectos, the first boss of the Starstone Barrow expedition, uses his magic power and the energy of the obelisk to become a tough fight for the players.
Abilities:
Summon Minions - Alectos summons 3 minions. Minions can jump into the air and damage players. They have little life and are weak on their own. They can kill players when they are together. Watch out for the minions.
Empower - Alectos empowers a random minion, making it more durable and deadly.
Arcane Orbs - Alectos fires 5 orbs in the direction they are facing. While the damage can be removed by tanks, the damage will be greater for other players.
Arcane Blast - Creates rapid explosions with the Alectos staff. The damage of these explosions is average.
Arcane Nova - Alectos spins his wand and smashes the ground. It sends Arcane waves and deals damage to a small area around it. Nova's range can be tricky. Players other than tanks should definitely run away.
Throughout the battle, Alectos will send his minions against you and strengthen them. Destroy minions with your ranged damage. Follow the animations of the attacks and dodge abilities. You can stun Alectos with heavy attacks. Takes more damage and creates a void when stunned. Players should avoid the Arcane Nova ability. This ability can deal incredibly high damage. Apart from that, avoiding attacks and attacking at idle moments will be enough for you to celebrate this war with victory.
Boss Awards
- +99.00 Coins
- +1350 XP
- +270 Weapon Mastery
New Mission: After winning the battle, scroll forward and you will find a note. Take this note with you as you will be returning. Go down the stairs and get your protection using the monolith. Clear the enemies and advance towards the next area. Get past the lasers with your bodyguard. This is the laser zone you passed before. Proceed and kill the enemies and get the key to the big door.
- New Mission: Disconnect the power lock on the Ancient Shrine and use the shrine to bless the Obelisk Key. (Power the Ancient Shrine and bless the key.)
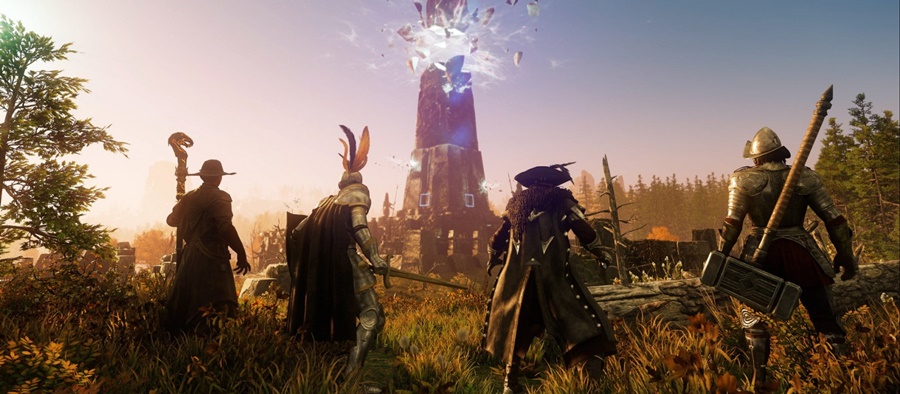
Get the power-up on the monolith and pass the lasers. This time you will use the stairs leading to the big door. Send the protected player to the lasers and head to the monolith powering the Ancient Shrine. After powering up the Ancient Shrine, return to the place where you fought Alectos and craft the Blessed Obelisk Key. When you return to the area, your battle with the last boss battle, Greundgul the Regent, will begin.
New World: Greundgul the Regent Boss Battle & Tips
With his golden armor, Greundgul awaits players who have sworn to protect the obelisk's treasures from mindless strangers and thieves.
Abilities:
Greundgul's Bone - Throws a bone at a random location and spawns enemies there. These enemies are easy to kill, but they surround players like a swarm of bees. The bone has its own health bar and will continue to send out swarms of enemies until you destroy it.
Leaping Smash - Greundgul jumps to a random place and stabs his sword into the ground. The pierced sword creates a shock wave that covers the entire area. This move is an attack that he only makes in the second stage.
The boss consists of two stages. The first step is very simple and straightforward. Greundgul attacks with his sword. His attacks happen in a specific order. You have to memorize these attacks and avoid them accordingly. Attacks can push, knock you up, or stun you. Periodically throws bones and sends enemies at you. It is useful to destroy the bone.
When you kill Greundgul, he respawns and attacks Leaping Smash and returns to battle. He only does this attack 5 times. You need to dodge as the attack emits shockwave. Do your timing well. Apart from these details, the second stage will pass like the first stage. Avoid attacks and be well-timed.
When Greundgul dies, the expedition will be complete. Don't forget to take your loot. You must also obtain the Starstone Diadem item to complete the Starstone of Shattering quest.
Boss Awards
- +99.00 Coins
- +1350 XP
- +540 Weapon Mastery
Expedition Awards
- Graveguard's Seal
- Staff of the Immolated Veil
- Obsidian Rapier
- Creeping Cold
- Fleeting Reality
You can get these rewards from the enemies you fight during the Starstone Barrows expedition.
We have come to the end of the New World Starstone Barrows guide . In this article, we talked about everything you need to pass the dungeon. Now that you have learned, you can embark on this adventure. Don't forget to collect your rewards and feed the dog (Barkimedes) at the door. See you later!
► Foxngame, the only address for reliable and discounted New World purchasing: https://www.foxngame.com/new-world